OAuth: Authorization Code Flow
用法 流程 示例 👉 變體:Authorization Code Flow + PKCE Use usemodernfullstack.dev to be Authorization Server. (Role: like Google, Facebook, and Github)
Technical sharing by programmers
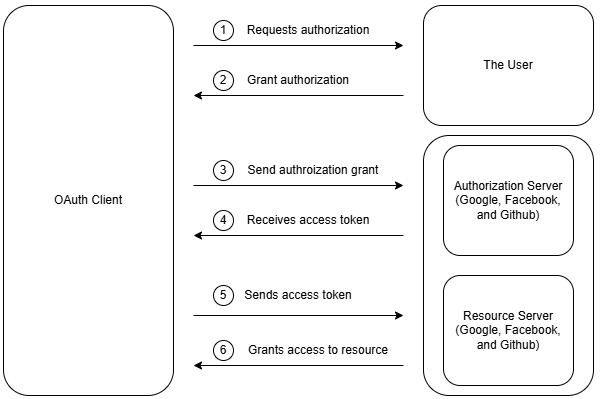
用法 流程 示例 👉 變體:Authorization Code Flow + PKCE Use usemodernfullstack.dev to be Authorization Server. (Role: like Google, Facebook, and Github)
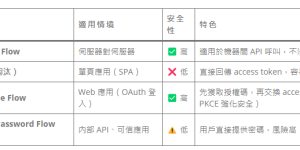
1. Client Credentials Flow(用於機器對機器 M2M 通信) 用法 流程 示例 2. Implicit Flow(已被淘汰) 用法 流程 示例 為什麼淘汰? 👉 解決方案:使用 Authorization Code Flow + PKCE(適用於 SPA 應用)。 3. Authorization Code Flow(適用於 Web …

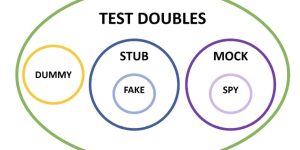
jest.fn(): Jest provides a mock function that replaces the real function so that you can monitor its behavior, for example:


The following two Code snippets, one is seriver-side tests, and one is react componet tests. dbConnect TestSuite is server side tests, use node for testEnvironment. This React Unit Test file, …
npm install –save-dev jest @types/jest npm install –save-dev ts-jest npx ts-jest config:init will generate file jest.config.js create __tests__ folder under root path of Next.js project, and create xxx.test.ts under this …

We access MongoDB through Mongoose module. We create these ts file to access MongoDB. (Example: Next.js Project, npm install mongoose) When you need to define an interface in TypeScript but …

GraphQL has the built-in scale types Int, Float, String, Boolean, and ID. Exclamation marks (!) denote non-nullable fields, and lists within square brackets([ ]) indicate arrays. use browser http://localhost: 3000/api/graph …
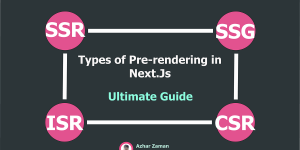
Server-Side Rendering: SSR 何時執行? 每次請求時,在伺服器端執行 getServerSideProps 來產生 HTML。優點: 缺點: Static Site Generation: SSG 何時執行? 在 build 時執行 getStaticProps,預先生成 HTML,並在 CDN 上提供。優點: 缺點: Incremental Static Regeneration: ISR 何時執行? 在 build 時先生成靜態頁面,但允許根據 …